QMK Configurator & Toolbox
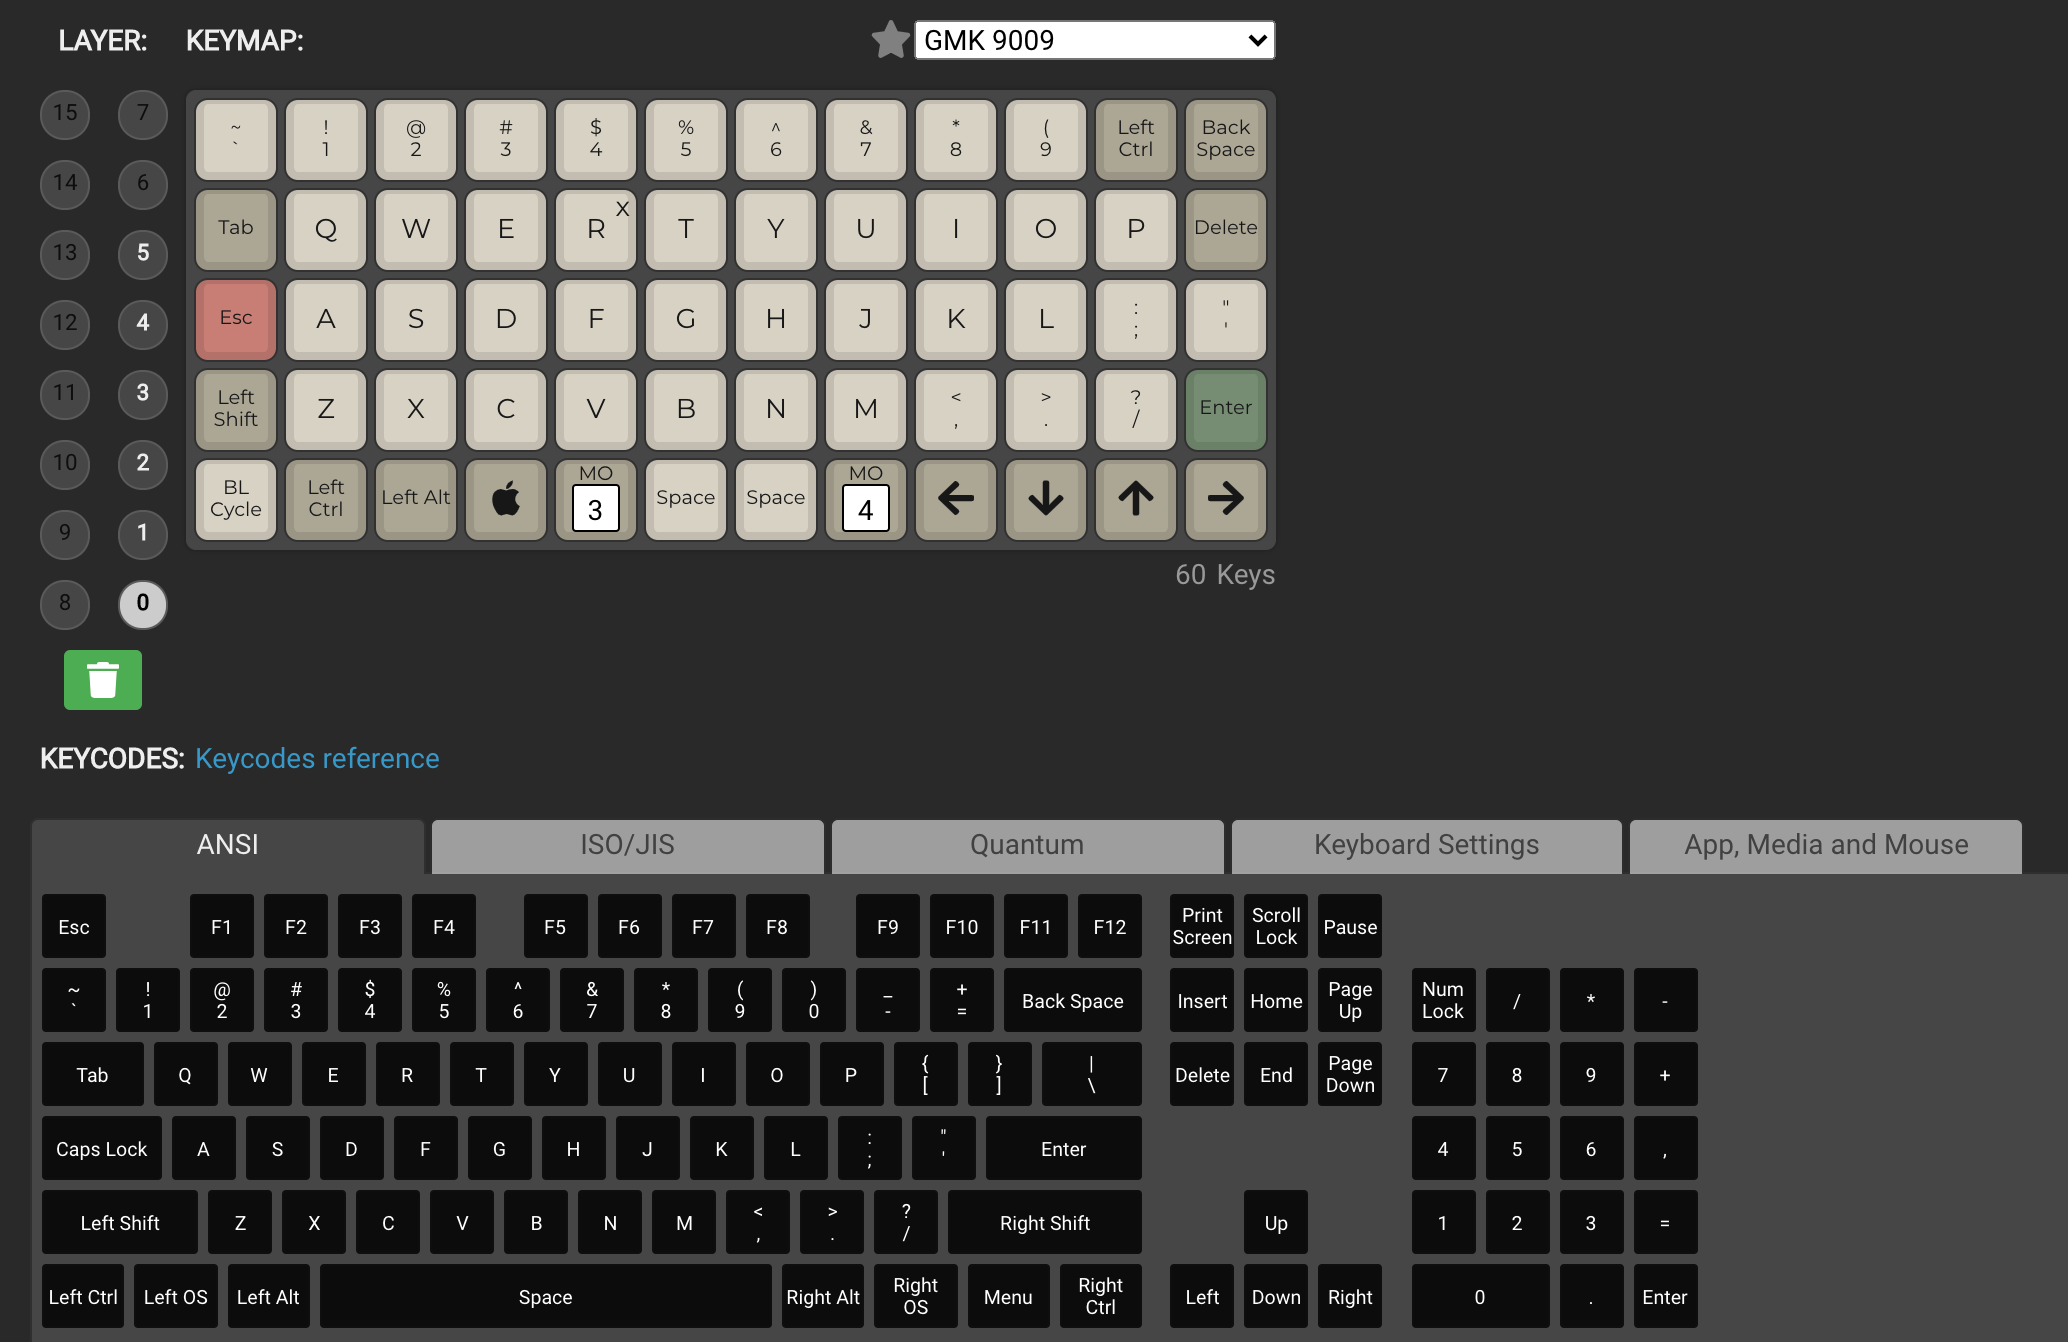
For a beginner, the easiest way to change your keymappings for your Planck or Preonic is through the QMK configurator and QMK Toolbox. You can use the interface in the configurator to easily adjust the keymappings on either keyboard. In addition, the toolbox will allow you to flash your config to your keyboard or restore the original keymappings if needed.
1. Create your Keymap File
You can set up your keymap file using the QMK Configuator for either the planck or preonic. Using the keyboard and layout dropdowns you can choose the correct version matching your keyboard. Adjust your keymapping by clicking on a key on the visual representation of your keyboard and then on any of the options below. When you're ready click compile, wait a couple seconds, and click firmware to download the .bin file that you're going to flash to your keyboard.

2. Download QMK Toolbox
Download the QMK Toolbox application. This application with recognize your keyboard once yout put it in DFU mode and you will use it to upload the new keymap onto the keyboard.
3. Put Your Keyboard into DFU (Bootloader) Mode
Plug your keyboard into your computer and at press the RESET button on the bottom of they keyboard. Your computer should recognize the keyboard and should be ready for you to flash the new keymap onto it.
4. Flash your keyboard
Open up QMK Toolbox and your keyboard should be recognized by the application. Under the local file dropdown, locate and click on the .bin file you created in QMK Configuator. Click the flash button to flash the file to your keyboard. When the process is done, unplug your keyboard, plug it back in, and enjoy your new keymapping!
Enjoy Your keyboard!
That's it! You can creat macros, shortcuts and or even change every key on your keyboard if you so desire. That's the beauty of the QMK firmware. For a future mod, you could even add a rotary encoder to compatible versions of the board and have a physical dial that you can program.

